Installing flooring around irregular shapes and tight corners doesn’t have to be a frustrating task.
With the right tools and a bit of patience, even the most complex spaces can be fitted flawlessly.
The photos below walk us through a smart and efficient method to achieve professional-level floor cutouts.
Positioning and Initial Layout
In the first image, the installer begins by placing the flooring sheet near the corner and wall base.
A clever tool is aligned tightly into the curves of the molding.
This setup is essential for transferring the contour of the wall to the flooring material precisely.
Ensuring the base material is laid flat and secure at this stage sets the foundation for an accurate cut.
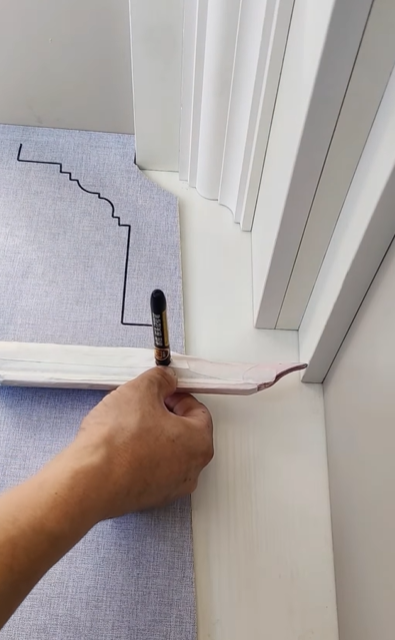
Tracing the Contour with a Template Tool
Next, a contour duplicator or profile gauge is used to trace the exact curves and steps of the wall.
The tool’s teeth conform to the molding’s shape, and the connected pen allows the installer to draw a perfect outline directly onto the flooring sheet.

This step is where precision truly matters—any error in tracing can lead to visible gaps.
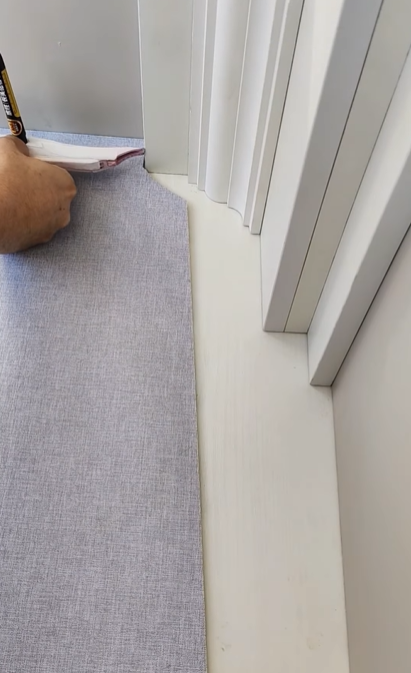
A Flawless Fit
The final photo reveals the result: a beautifully cut flooring piece that hugs the detailed edge of the wall perfectly.
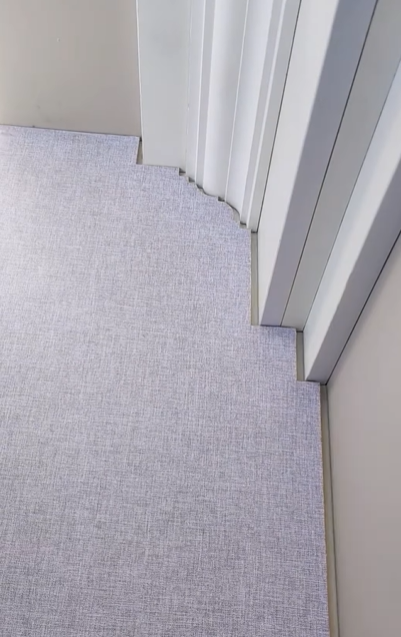
Every notch and curve fits snugly, creating a seamless finish without the need for excessive caulking or cover strips. The professional quality is clear—clean, exact, and satisfying.
Craftsmanship Meets Clever Tools
When tackling tricky corners or decorative moldings, combining a steady hand with the right tracing tools can make all the difference.
This method turns a once-challenging task into a rewarding and efficient process, proving that perfection is all about preparation.