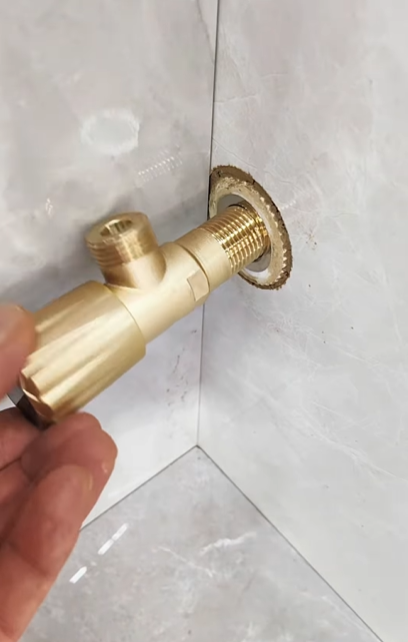
The installation starts with a brass angle valve ready to be attached to a threaded pipe outlet embedded in the tiled wall.
Ensure the threads are clean and the fitting is aligned straight. This is important for a secure and leak-free installation.
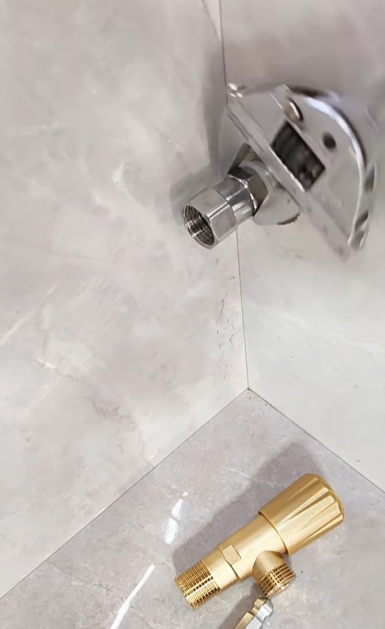
Insert the Thread Adapter and Decorative Cover
Next, a chrome thread adapter with a decorative flange (escutcheon) is prepared.
This piece helps bridge the wall pipe and the valve body while also covering any rough tile cuts for a clean, polished look.
Secure the Adapter
Using a wrench, the chrome adapter is screwed onto the wall pipe until snug.

Avoid over-tightening to prevent thread damage. This adapter will now serve as the mounting base for the brass angle valve.
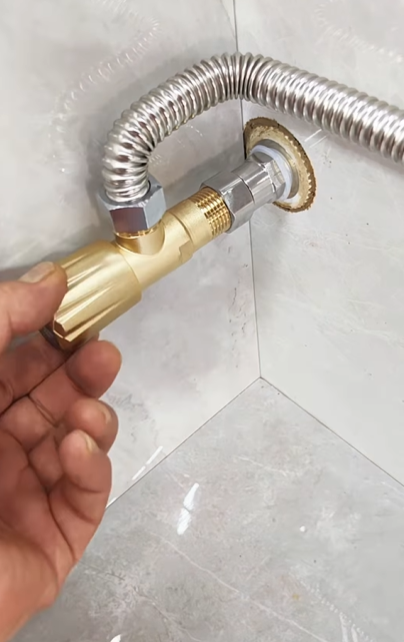
Final Valve and Hose Assembly
The brass angle valve is then threaded onto the adapter.
A flexible stainless steel hose is attached to the top outlet of the valve, ready to serve fixtures like a bidet, toilet tank, or washing machine.
Make sure all connections are tight and well-sealed.
Ready to Use
With the installation complete, you now have a functional, durable brass angle valve installed neatly against a tiled surface.
Always test for leaks and ensure the handle operates smoothly.