

When it comes to giving walls a luxurious, finished look, adding decorative moulding is a powerful technique.
Below is a step-by-step guide demonstrating how a simple corner can be transformed into an elegant architectural feature using decorative trim and adhesive techniques.

Preparing the Corner and Adhesive Application
In the first step, the corner of the wall is prepped by applying multiple blobs of adhesive across the lower section of the drywall.
This adhesive serves as the anchor for the decorative trim.
Precision is key here, ensuring even distribution to hold the trim in place securely.
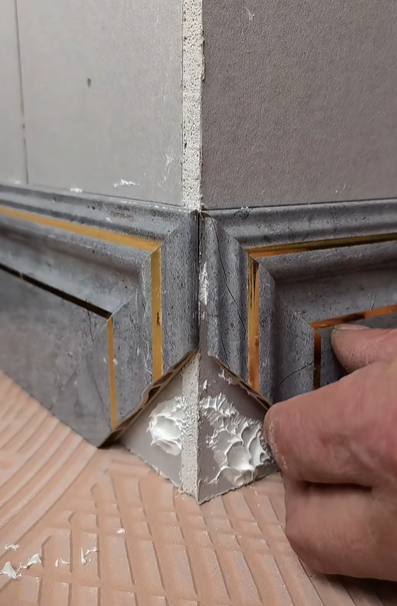
Fitting the Decorative Trim Pieces
With adhesive applied, the next phase involves carefully placing and pressing the moulding pieces into position.
The trim is cut at precise angles to fit seamlessly at the corner, giving it a sharp, professional appearance. Hands guide the placement, ensuring that each piece aligns perfectly with the adjacent surfaces.
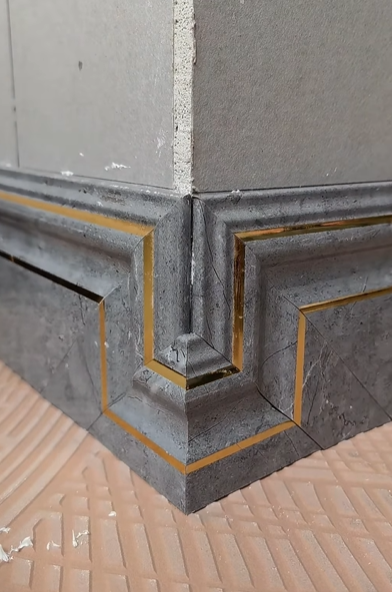
Finishing Touches and Seamless Integration
Once the trim is in place and the adhesive has set, any excess material is cleaned off, and the moulding is checked for alignment.
The final result is a polished, seamless corner with rich detailing and subtle gold accents that elevate the room’s aesthetic
Transforming basic wall corners into luxurious architectural statements is a simple yet impactful upgrade.
With precise cutting, proper adhesive application, and attention to detail, even the most standard space can exude sophistication.